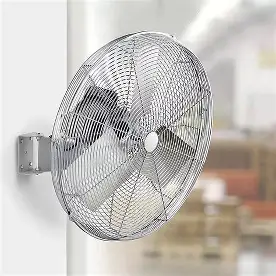
How Should You Install a Wall Mounted Industrial Fan Safely?
Most people spend all their time picking the right fan model. They skip over the wall itself. That's the mistake. Once bolted to a weak surface, a fan can vibrate loose, drop, or pull chunks of drywall down with it.
This guide takes you through every stage, from checking your wall beforehand to wiring and testing. By the end, you'll know what to do, what to skip, and where the real dangers actually sit.
Pre-Installation Prep: What You Must Do Before Drilling
Proper prep separates a fan that runs quietly for years from one that fails in months. Getting awall mounted industrial fan installation right starts way before the drill comes out, so invest time here, and you'll dodge most common errors.
Confirm the Wall Can Actually Hold the Weight
Industrial fans are heavy. A typical wall-mount unit weighs between 15 and 40 pounds, and that spinning motor creates torque that a static object never would. You need wall studs, not just drywall anchors, for any fan above 20 pounds.
Use a stud finder before marking anything. In American residential and light commercial buildings, studs sit about 16 inches apart. If your mounting bracket won't line up with two studs, get a plywood backer board (3/4 inch minimum) that spans across two studs, then bolt to that.
Check Electrical Requirements First
Industrial fans pull between 1.5 and 8 amps at 120V or 240V, depending on motor size. Don't just assume the nearest outlet's on the right circuit. Check the fan's nameplate for amperage, then verify the breaker serving that circuit can take the load.
A 15-amp circuit already serving multiple devices shouldn't absorb a 6-amp motor. If it's near capacity, hire a licensed electrician to run a dedicated line. You'll save money, much cheaper than swapping out a fan that keeps tripping breakers in July.
Gather the Right Hardware
The bolts shipped with the fan often won't match your wall type. Concrete and masonry need concrete anchors or wedge bolts, not wood screws. Grab lag bolts at least 3 inches long for wood studs; for concrete, use 3/8-inch expansion anchors rated for the fan's weight times a safety margin of 4x minimum.
How to Install a Wall Mounted Industrial Fan Safely, Step by Step
Installation follows a strict sequence. Skip one, and you create a risk that won't show until the fan's already running.
Mount the Bracket Before Anything Else
Use the bracket as a template and mark your drill points. Drill pilot holes slightly smaller than your fasteners. Insert lag bolts into studs (or expansion anchors into concrete) until the bracket sits flush with zero movement. Tug it hard in every direction before you hang the motor.
Some brackets have slotted holes for height tweaking. Position the fan so the lowest blade arc clears 7 feet from the ground; that's the general minimum for occupied spaces under OSHA rules.
Attach the Fan Head and Check the Tilt Angle
Most industrial wall fans come with an adjustable swivel or yoke mount. Slide the motor housing onto the bracket, insert the swivel bolt, and hand-tighten it first. Pick your angle (usually 15 to 30 degrees downward for floor-level airflow), then lock the swivel nut. Use two wrenches, one holding the bracket, one tightening the nut. Tighten against a free-spinning swivel, and you'll strip it.
Wire Safely and Test at Low Speed First
Turn the breaker off before touching any wiring. Connect ground to ground (bare or green wire), neutral to neutral (white), and hot to hot (black). If there are multiple speed wires, the manual tells you which color connects where on the switch.
Once wired, restore power and run the fan at the lowest speed for two minutes. Listen for vibration or rattling; a loose blade, unbalanced motor, or underseat bolt will announce itself right away at low speed, before full power turns it into a real problem.
Safety Checks and Ongoing Maintenance
A safe install doesn't stop when you flip that switch on. Industrial fans run hard, often in dusty or humid spaces, so they need regular attention.
Inspect Fasteners Every 90 Days
Vibration of the bolts over time. Check every bracket fastener every three months with the torque spec from your manual. Use a torque wrench; don't just hand-tighten and call it good. After 500 hours of motor vibration, a bolt that feels tight enough will come loose.
Keep the Fan Guard Clean
A blocked blade guard starves the motor of airflow and makes it work harder. Wipe the guard down monthly in dusty spots. Never remove it while running, and always kill power before cleaning.
Know When to Call a Pro
If cracks appear around the mounting point, if you hear grinding, or if the fan develops a visible tilt, stop. These aren't just cosmetic. A qualified electrician or structural contractor can tell you whether the mount needs relocation or reinforcement.
Conclusion
Safe wall mounted industrial fan installation comes down to three things: a structurally sound mounting surface, correctly rated hardware, and proper wiring. Take your time on the early steps, follow the sequence, and run the fan at low speed before full operation. Vevor's wall-mount industrial fans ship with detailed mounting instructions and all specified hardware, so you're not improvising. Get it right the first time; the fan runs without trouble for years.
-
4K Dash Cam Deal: Save 70% on a 360° Car Camera With 64GB Card
Save 70% on this 4K Dash Cam Deal! The CURRENBA 360° dash cam features front, rear, and side recording, 4K video, night vision, WiFi app control, parking monitoring, and a 64GB memory card for only $59.99.
-
Grow Bag Garden Deal: Save 50% on FEED GARDEN 20 Gallon Grow Bags
Gardeners can save 50% on this Grow Bag Garden Deal! The FEED GARDEN 20 Gallon Grow Bags 8-pack features durable 300G fabric, reinforced handles, and a breathable design for growing vegetables, flowers, herbs, and more.
-
Allure Beauty Box Deal: Get $10 Off Your First Box Plus $201 in Beauty
Discover new beauty favorites with the Allure Beauty Box Deal! New subscribers can get $10 off their first monthly box with code ALLURE10 at checkout. Each box includes $201 in beauty products, a $55 gift, and free shipping.
-
Nordstrom Anniversary Sale Opens to Everyone July 18
The Nordstrom Anniversary Sale opens to the public on July 18 and runs through August 9. Shop exclusive savings on new-season fashion, shoes, beauty, and wardrobe essentials before prices go back up. Visit ConsumerQueen.com for more sale coverage and shopping deals.
-
Staples Back to School Freebies: Score Weekly Through September 12
Staples is offering weekly back-to-school freebies with qualifying purchases through September 12. Shoppers can score free school supplies, office essentials, and more while supplies last. Visit ConsumerQueen.com for more back-to-school deals and savings.
-
Safety 1st Car Seat Deal: Save $40 on the Grow and Go Sprint at Walmart
Walmart has the Safety 1st Grow and Go Sprint All-in-One Convertible Car Seat on sale for just $99, saving shoppers $40. This 3-in-1 convertible car seat grows with your child from infancy through the booster years. Visit ConsumerQueen.com for more family-friendly deals and savings.