Paint Clay Garden Pots In 3 Steps – It’s Easier Than You Think!
Spring and summer are my favorite seasons in which to change up my decor. See how to Paint Clay Garden Pots to make them your own!
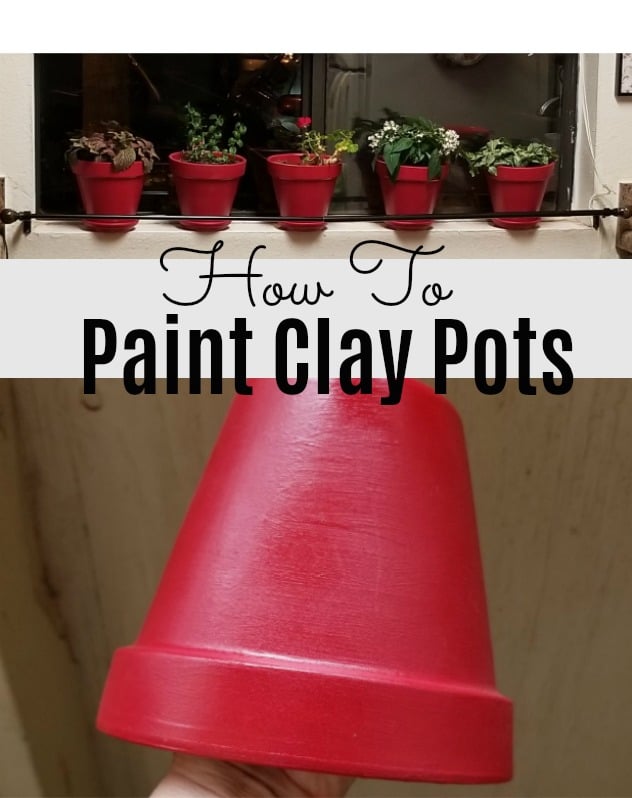
Paint Clay Garden Pots – It's Easy!
I love planting flowers and veggies in clay pots. They just seem to do better for me when I do. The pots soak up water fast and that helps prevent over watering. However, having pots all the same terracotta color can get kind of boring. I like bright colors so I decided to paint some pots for the plants residing on my kitchen window sill.

As you can see, it's not a very attractive display but hopefully by the end, It'll look really cute.

Paint clay garden pots easily in 3 steps – clean, paint and seal –
What you'll need:
- Clay pots
- Acrylic craft paints
- Plastic disposable plates
- Small or medium foam brushes
- Wire brush
- Clear spray acrylic
Step 1: Clean those pots!
To easily clean your pots, soak them in a container of warm water for about an hour or so. Then take a stiff brush and clean off all the dirt and debris as well as any price tags. Let them completely dry before going on to step 2.
Since my pots were brand new I skipped step one and just made sure I wiped them down really well before painting.
Where to Find Clay Pots:
Just as a quick side note: You don't need to spend a lot of money on clay pots. Quite the opposite, these go on sale at Lowe's and Home Depot in the spring for just a few dollars each! And, if you're wanting the smallest sizes, you can actually find them at Dollar Tree or Dollar General during the spring. If you do happen upon clay (terra cotta) pots on sale or clearance, it's a great stock up item.

Step 2: The fun part – painting
Add your paint to one of the plastic plates and use a small amount of water to thin it. That will make the paint go on easier and smoother. Paint the whole pot including about 3 inches down inside. If you paint the whole inside you may prevent the plants from draining properly.
I found painting from side to side much easier that trying to paint up and down the pots. Let the paint dry and repeat if you need to (the pots can absorb a lot of paint). I gave mine 2 coats of paint.

Step 3: Seal
After your pot has dried (may take a day or so), apply two coats of a clear spray acrylic to seal the paint and protect it from damage. Sealing your pots also make removing dirt and debris easier 😉 If you don't wan't shiny containers be sure and choose a sealer with a matte finish.
Now you're done! If you fancy yourself an artist you can paint designs on your pots after the base coat dries. Keep in mind this may extend the drying time needed before applying the sealer.
Ready to see how mine turned out?

I attached a small curtain rod across the front for added stability. My cat has a habit of trying to jump up onto the window sill and the rod prevents the pots from being knocked onto the floor.
Nothing fancy but it looks a sight better than what it looked like before 🙂
More Ideas for Painting Clay Pots:
You can use your imagination and make some super fun potted plants! All uniform is my favorite look, but you can also brighten up a corner with several coordinating patterns and colors. Here are some ideas:
- Turquoise
- Bright Green
- Black and White
- Distressed white or cream
- Distressed gray (to look galvanized)
- Chalkboard paint
- Chalkboard contact paper
- Apply labels
- Let the kids decorate with paints! Use non-toxic paint of course (more options on Amazon).
Love this Paint Clay Pots Tutorial? See More Home and Garden Posts Here:

10 Vegetable Garden Mistakes- and How to Avoid Them